Pages

Wednesday 31 August 2011

SM64GS Title Screen


Hey all!!

I recently have done some editing to a screen in SM64GS. I mainly just wanted to show off the picture, only because I want to XP

Anyway, I used a program called Tilemolester which can edit any textures in the game, including ones you can't usually edit. I'll just shut up and let you see the picture.


So, this is the screen that'll appear when you first start playing the game. I only edited the Nintendo part, to "The Green Stars". Well, I hope you like it. It looks much better in the game, rather than in this picture.


Thursday 25 August 2011

SM64GS Update

Hiya all!! I've decided to do another update, but on a couple of levels I won't be importing for a while now.

So, what are these 2 levels I'm showing you today?? Well, I'll tell you now, they're part of the Overworld, or HUB. There'll be 3 parts to the HUB. The first part has the first 4 courses in it, the 2nd part has the next 3 courses in it, the third will have the last 3 courses in it. I've only completed HUB 1 and 2, however, I think HUB 1 needs a little bit of work. Anywasy, to the pictures.


I'll explain HUB 1 before I get to the 2nd HUB. Ok. As you can see in the first picture, there's a big bridge made of rock, supported by a big rock model thing. There's also a brick wall in the background. That brick wall leads to the second HUB.


In the second picture, you can see a bridge, and water. That's just a little river running through, for no major purpose at all. You can also see the pillars to get up on thebig rock platform. I might have to rethink those, it's slightly hard for beginners to get up there.


In the third, Mario is standing on that rock bridge, and looking down at the bridge over the water. You may be able to see holes in certain areas. They're just spaces left to add the doors. Whereever there's a star door, you'll need a certain amount of stars to get it. I'll probably add signposts to tell you how many you'll need. Anyway, let's check out HUB 2, which is my favourite of the 2 HUBs.


The theme for HUB 2 is a cliff area. You can fall down and die around here, so just watch your step. So, in the first picture, I just show myself on a bridge used to get to a small island, if you don't feel like long jumping, which is perfectly easy to do. There'll be a warp pipe going to a course on that small island.


In the second pocture, it's just quite boring, only flowers, and grass. Well, at least you know there's good soil to grow flowers arond here XP


The third picture ismore interesting. The first thing you notcie is probably the big star, with the number "100" in it. Now, what could this possibly mean??? Well, remember that the maximum star count in my hack will be 100?? Now do you know what it's for...

Oh, 'll tell you anyway. There's an opening, that's for a star door, the star represents, you need 100 stars to get through. There'll be a pipe going somewhere for those who get 100 stars, but still want more adventure. Anyway, enough on that.


Anyway, course-wise, I'm currently planning a new updated Whomp's Forest. The other one I made (which is my first video) is kinda bad, compared to the new one I'm planning. You'll find out what it's like when I post an update on it, but that'll be another day. Anyway, thanks for taking the time to read this.


-Luigi*


Friday 19 August 2011

SM64GS Update

Hello guys!! I've been doing some hard work since the last update. I have finally gotten the textures to work :D So, since then, I have been importing some of my finished levels, and I thought I'd show you some. Two of the levels I have previews on Youtube, so I'll give links to those, and one is just some pictures. Let's get to the good stuff, shall we??

Ok, so my first import was Fiery Factory. It's course number 5, and replaces Haunted House. Fiery Factory is of course, a big factory with lava. I had to include the bullies from Lethal Lava Land, somewhere in my hack, so here they are. I think this level is one of my favourites of all my levels so far. Check it out here:
http://www.youtube.com/watch?v=c-JlAKu5K-c&feature=channel_video_title


My second regular course I've imported, is Bob-Omb Plains. The level has Bob-Ombs, and it's in these grass fields (hence the level's name). This is course number 1, and replaces Bob-Omb Battlefield. This is what I'm calling, a beginner's level. It will have some tricks that some newbies will have to learn, to obtain the stars. I have aimed my hack at beginners/not-so-good players, and at skillful players, so both can enjoy, without one missing out. Once you've played this hack, you may even be quite good!!! So, here's a link to the level: http://www.youtube.com/watch?v=kMwq1PoIe1g&feature=related


Also, I've been doing some sound hacking too!! As you may have noticed, I've changed the star select screen's music. I've imported a remix of M&L SS File Select. In SM64, you can't have the exact song, because the sound format is ridiculous. So, hackers have to remake the song as close to the original as possible.

So, this last level is not a regular course. It only contains 2 stars, instead of 7. Of course, it's a secret course. However, not just any old secret course. It's my Wing Cap level, where you activate the Wing Cap. This level, is reasonable hard. Hitting the switch, is very easy, like the original game. Like the original game, getting the red coins is harder, but my Wing Cap, it's even harder than that. You have to weave through many places, and go from many heights to get all 8 red coins. I have made the course easier, by adding platforms at the back, or the side of each tower, so you can get back up to where you started, if you want. Anyway, I'll stop yacking on, and show you the pictures.


In the first picture, is the starting platform. As you can see, it's quite easy to fly down to the main platform where the Wing Cap Switch is (picture #2). In the third picture, you can see Mario flying around. You can see the red coin, it's under the Main Platform (the one Mario is standing on in picture 2). While testing this level, I thought it was a good challenge for some. It challenged me, and I'm pretty good at SM64. You may also have notcied, what about the 2nd star?? You said there were 2. Of course there ARE 2, one is hidden somewhere. No hints, you'll just have to find it, won't you!! That's it for now. Make sure you come back for more updates!!

-Luigi*

Wednesday 10 August 2011

SM64GS Update

Alright, a new update. No pictures this time, but a fair bit of writing.
So, what's new since the last update?? Well, instead of just 60 stars, I think that's a small amount, so I'm bumping the star count to 100 stars!! Instead of 7 regular courses, there'll be 10. I've made many changes, including not 2, but 3 levels in the Overworld/HUB. I've also added another Bowser course/fight and I'm using all caps, Metal, Wing and Vanish.
The main thing I came here to tell you, is just to show you the names of the levels, and their progress. I'll tell you the # of the course, the name, it's progress, and whether the name is temporary or not.
Regular/Main courses:
1: Bob-Omb Plains (Finishing touches still to go)
2: Whomps Forest (Minor finishing touches)
3: Lofuer Lagoon (Finishing touches still to go)
4: Snow Level (Haven't thought of a name yet) (Not yet started)
5: Fiery Factory (One of my fav levels so far) (Some finishing touches)
6: Boo's Frightful Manshion (No where near finished)
7: Melty Magma Land (Finished)
8: Scorching Desert (Just finishing texturizing it)
9: Icecrystal Caves (May be a different name, but definetely a cave theme) (Not yet started)
10: (Not sure the theme nor the name of this level yet (I'm thinking of some sort of tower, maybe a level in the cosmos, which will be very hard)) (Not yet started).

Side Levels/Bowser Levels/Cap Courses:

1: Lava Slide (Not yet started (May get a better name))
2: Desert Pyramid (Needs finishing touches (Only temporary name))
3: Airship Level (In progress, still being tested (Again, temporary name))

Bowser Courses:
1: Bowser Course 1 (Temporary Name (Not yet started))
2: Bowser Course 2 (Temporary Name (Not yet Started))
3: Bowser's Castle (Pretty much finished, may need a few touches though)).

Cap Courses:
Wing Cap Temple (Temporary Name (Almost finished))
Vanish Cap Temple (Temporary Name (Not yet Started))
Metal Cap Temple (Temporary Name (Not yet Started))...

Overworld/HUB

All are temporary names!!

1: HUB Part 1 (Almost finished)
2: HUB Part 2 (Not yet started)
3: HUBPart 3 (Not yet Started)

That is pretty much all the levels in my hack. Some of these levels are just plans, I haven't made the model design on paper yet (I usually do that). So, It'll still be a few months away, and I've been doing more research on my texture problems. Still nothing :/ Well, if you have ANY questions, feel free to ask. That's it for me, for now.

-Luigi*/Kampel125


Saturday 16 July 2011

Super Mario 74 (A recent 100% finished hack)

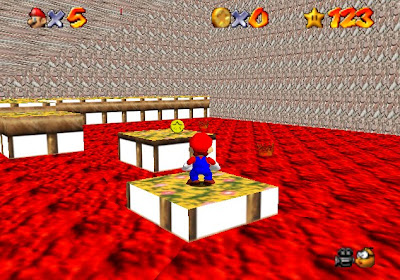
So, recently I've been doing a few things. Working on my hack, SM64GS, and playing this game. This is a hack that was finished and released a few weeks ago, so there's plenty of youtube videos on how to get some stars. Instead of the usual 120 stars in the original game, Lugmillord (creator of this hack) has bumped the total up to 150. Super Mario 74 seems to be the sequel to Super Mario 64.

So, what's good about this hack anyway?? Well, it's very creative. Many hidden areas. There's plenty of surprises. You'll enjoy it all the way through (well, except when you're stuck on really hard stars). Another thing about SM74 is that the degree of difficulty is soaring high. I'd say about a 9/10. The game to me is impossible without using savestates. I used them as frequently as I could. Also in many places the game's camera angle is shocking. If you're going to play this game, make sure you read all the signs. They give important information.

If you compare this game to other hacks, there is not much customization, such as no custom enemies, no custom behaviours etc. However, there is a bit of custom msuic, so you won't be listening to the same music that's in the original game. In fact, SM74 is one of the most similar games to the original SM64. Other hackers have really made thier hack more of theirs, and they look nothing like the original game. So, my final rating for SM74, is 9/10.

So, after reading all of this, do you want to play it??? Alright then. If you want it, follow the instructions down below.
-------------------------------------------------------------------------------
You'll need:
SM74 Rom (of course): http://www.mediafire.com/?ar3se6fqfbevacs (Just click download when it's ready).

Super Mario 64 Rom (This is needed from the start of patching the rom): (Apparently it's illegal to supply a download link to copyrighted roms, so I'll tell you how to find it instead).

OBJ Importer (to make some settings in order to play): http://sites.google.com/site/messiaen64/level-importer (To download, scroll down the page till you find this: "Download Mario 64 Level Importer v15". Click it).

PPF-O-Matic (to patch things into the SM64 rom): http://www.romhacking.net/utils/356/ (Scroll down the page till you find "download file now").

SM64 Rom Extender (Needed to extend the rom, making it easier to patch things to): http://homepage.mac.com/qubedstudios/Mario64Tools.htm (Scroll down the page till you see "Download the Windows/Mac OS X version of M64 ROM Extender 1.3b").

Project 64 (Emulator to play the game on): http://www.pj64-emu.com/downloads/func-startdown/34/ (On the top of the page, a pop-up thing should appear, right click it and click Download File.
-------------------------------------------------------------------------------------
Setting up the Rom

1: Download/install those files. To find the SM64 Rom, type "Super Mario 64 Rom" in google, and click the 2nd link. Then click the download buttons that appear.

2: I recommend putting those downloaded stuff right into a file on the desktop called " SM64 Stuff". Don't forget to extract the files too if they're zipped. Now, you see your SM64 rom?? You need to open up "M64ROMExtender". Go through the files that come up until you see an application with an orange symbol. Double click that. Click Open File, and find where you saved yuour SM64 Rom. When found, open it, and wait for the file to be extended. When finished extending close the ROM Extender.

3: Open up the "Mario64LevelImporterv15" folder. Click "obj_import15". Then find the "Rom_Expand" application. You have to drag your Extended SM64 Rom (should be called "Super Mario 64 (U) [!].ext.z64") into that rom_expand application. Wait for the rom to expand. When finished, close the obj_importer stuff.

4: Now, open up "ppfomatic_version_3.0". Click the application called "ppf-o-matic3" or the one with the CD image on it. Click "Run". Then, where it says ISO file, on the end, there's a symbol. Click it, and open up your SM64 ROM (the extended and expanded one). To find it, you have to click at the bottom of the open page, the Files of type. Click the down button, and click all Files. Then select your SM64 ROM. Click open when you've found it. Then, where it says patch, click the symbol and find where your "obj_import6" file is. It's in your "obj_importer" stuff. Click "Apply" once you've finished

5: Repeat step 4, except one thing. For the patch, instead of opening up the "obj_import6" file, you must open up the "Super Mario 74E V1.4" file. It should be in your SM74 folder. Once you've selected those, click "Apply". Now you are ready to play the rom. You may want to rename the rom you've been editing to something like, Super Mario 74.z64 (you muct include .z64 in the name). Now you need to set up the emulator, becuase the game doesn't work yet.
-------------------------------------------------------------------------------------
Setting up the Emulator

1: So, open up Project 64 (considering you've already installed it of course). If you're having trouble finding the application, go into "My Computer", "Local Disk (C:)", "Program Files" (you have to have permission to go into there). In there, scroll down till you find "Project 64 1.6". Click it, then it should be there. The emulator is theone with the symbol PJ64. Copy that file to a place you'll most likely find it easily, so you don't have to rumage through the Program Files everytime.

2: Once you've found it, and opened it, click "Options" then "Settings".
Click "Options", then untick the box next to "Hide Advanced Settings". Now, find and click "Advanced". Find the "Deafult Memory Size", and click the little arrow. Select the "8MB" option. Then click "OK". Now you can finally play SM74. However, you may want to set up the controls first, so you can run around without fiddling with every keyboard letter/symbol to see what's what.
-----------------------------------------------------------------------------
Setting Up the Controls

1: Click "Options". Then click "Configure Controller Plugin". You'll see a page come up with the controls. You only have to edit "Analog Stick" and it's options, "C-Buttons" and its options, and the A, B, Z etc buttons. Completely ignore the Digital controls. To edit the buttons, click the box next to the button you want to edit, then click the Letter/Symbol you want it to be. You may have to edit the digital buttons to other random letters, so you can get the C-Buttons to what you want them to be. When finished, just click "Save Profile" then "OK".

Alright, once you've finished setting up the controls, you can play!! To play, click "File", "Open ROM". Then find your SM74 ROM. Congratulations, now you can play!
-------------------------------------------------------------------------------------
If you need to contact the owner of the hack, Lugmillord, you can visit him on his YouTube page: http://www.youtube.com/user/Lugmillord

Friday 15 July 2011

SM64GS Plot

Sorry for no Posts recently. I've kinda forgotten about my blog. Been doing other stuff. I was bored earlier, and got an idea for the plot of my SM64 Hack. Here's what I've got so far...
-------------------------------------------------------------------------------------------------
1000 Years ago...


60 Green Comets (Stars) were floating alone in space.
No one owned them. No one knew of their existence. No one knew of their special powers.
One special day, a special person found one floating alone. He had never seen such
a special object, therefore he kept it. He observed the star, and he discovered something.
He knew there were more of these special stars. He decided to go on a hunt to find them.

Many years later, he found them all. He put them all together to form a Grand Star.
This unlocked the star's powers, therefore making him very powerful. He obtained 3 special
abilities. Flying, Invisibilitly, and Metal. He lived for a very long time.

Centuries later, he was getting very old and knew he had to pass down the Grand Star. He
knew three people that he trusted very well, but couldn't choose who to give the star to.
So, he split the Grand Star into 3 slightly smaller stars. One took off with the Flying
ability. One took the Invisibilty. One took the Metal Ability. These people still hold these
stars today, but live out in the cosmos, where not many people can get to. The stars are all
kept in secure temples.


Today...


As the powers are passed down from generation to genertaion, it happens to be that Princess
Peach holds one of these powers. Bowser, who we all know, had found out about these powers
one day. He decided he could use the powers for mischief, and to win battles over his nemisis
Mario. One day, while Mario was enjoying a nice relaxing day, Bowser took off to kidnap the
Princess. Once kidnapped, he ordered his troops to take him up to space to where the stars
are kept. Only the keeper of the stars can open the temples, unless they have hold of the
stars themself. Once he used Peach to get the first Grand Star, he used its power to locate
steal the rest. When Mario got back home, Luigi told himthe bad news. Mario takes off to
get the stars back.

So, what do you think??? Sounds pretty good to me. When the hack is finished, there'll be 3 temples. Wing Cap, Metal Cap, and Invisible Cap. I'm creating the Wing Cap Temple while I'm writing this, it looks awesome. Oh, and I've decided I'll be including 60 stars instead of 50. Well, that's all for now. BYE BYE :3

And sorry about the plot how it's all weird in sentences I copied it out of my notepad, and that's how it turned out.

-Luigi*

Saturday 18 June 2011

SM64GS Update

Yep, another update being served your way. I shouldn't even be showing this, but, why not. Barely anyone comes here. So, what's new then, you're probably thinking?? So, I've been making new levels recently. I got a new idea of a NSMB Themed Bowser's Castle. It'll be the level that leads towards the final Bowser. Only trouble for you guys is, the only way to get to the Final Boss himself, is to retrieve all the stars in my hack, which will be 50. You'll end up having to even get the stars from Bowser's Castle before you fight Bowser. Now, lemme guess, you're saying: "Oh, get on with the pictures Luigi*"?? Well, I should stop blabbing on and show you the new pictures.


So, this first pocture we're seeing here, is around the start of the level. As you can see, there's stuffed up textures (which I haven't got around to fixing). There's also small platforms, and alot of lava. What's so special about this course so far?? It doesn't look NSMB themed yet?? Well, I know that, because the textures I'll fix up, will be NSMB ones, so it'll look more like NSMB.


So what about this picture. All I can see is more Lava, a purple floor switch, and even more small platforms. There's even a lava wall?! The lava wall right there, is probably one of the hardest parts of the level, about 1 in 3 tries of myself trying to pass that part, I survive, the other 2 times I usually die. Don't worry though, there's a recovery heart around the purple switch, and it will help you alot.


Ah hah!! Now we're getting somewhere. A Star Coin off NSMB. Why though?? What does it do?? Does it help you?? Well, firstly, this coin, helps you get one of the stars. As I said earlier, there'll be 50 stars, these Star coins, will make one of those Green Stars collectable. Or, just to make this easier, touch all the Star Coins in the castle (there's 5 of them) and a star will appear, then you get the star. Sounds easy right??? WRONG!! The star coins are in very hard to find/get to places. The one Mario's standing in front of in the picture, is probably the easiest of them. I died about, 10-20 times while testing the star, many times I got most of the coins, then died.


Well, that's pretty much it, I plan to make a video of one of my levels, Melty Magma Land, within the next few hours or so. It'll be posted up on my YouTube channel.


-Luigi*